


1: To create your own Gmail account (Gmail ID), first of all you have to gmail.com Go to and then click on Create account option coming below.
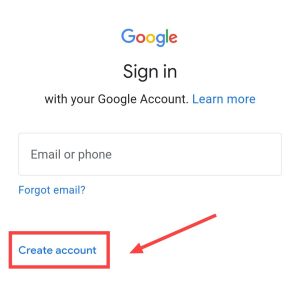
2: After clicking on the Create Account option, you will get two options. Out of this, if you want to create a Gmail ID for yourself then click on For Myself and if you want to create a Gmail ID for your business then click on To Manage my Business.
3: Now under the Create A Google Account section, where First Name is written, you have to write your first name and where Last Name is written, you have to write your surname and click on Next written below.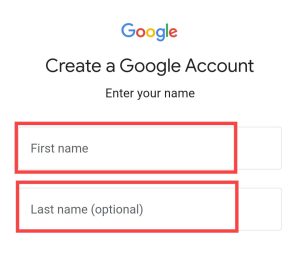
4: Now a page with basic information will open on your screen, in which you have to fill the information given below. After entering all the information, you have to click on the Next button visible in the blue colored box below.
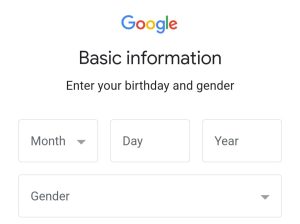
- Month: Enter your month of birth.
- Day: Enter your birth day.
- Year: Enter your year of birth.
- Gender: Select your gender. You can select either male or female or others.
5: Now the Choose Your Gmail Address page will open on your screen, where you will already be given ideas of 2 email ID addresses. If you want, you can select any of them. If you do not like the already given email ID address, you can also create your own email ID address.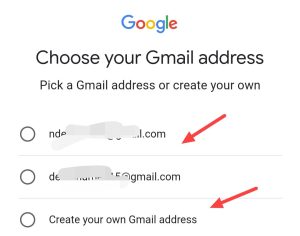
For this, you have to click on Create Your Own Gmail Address visible at number three and create your own favorite email ID address. If you want, you can also use your phone number by clicking on the Use Mobile option shown below. After doing any method you have to click on Next below.
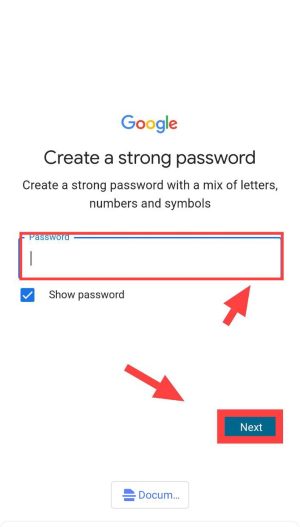
6: Now the Create a Strong Password page will open on your screen, in which you will see an empty box below the password section, there you have to enter a strong and strong password which only you can know. After entering the password, click on the Next button shown below.
7: The Add phone number page will now appear on your screen. You don’t have to do anything in this. Just below where it is written Yes, I’m in, you have to click on it.
8: Now the Privacy and Term page will appear on your screen. Here you have to go down and click on the I Agree button.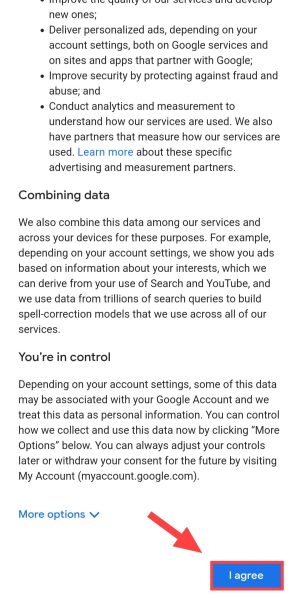
In this way the process of creating Gmail ID is completed. Now you can use Gmail by going to the Gmail application and logging in with your Gmail ID.
What are the benefits of Gmail ID?
- After creating a Gmail ID, you can use all the services of Google.
- With the help of Gmail ID, we can send email to any person anywhere in the world.
- We can send important documents, videos, audios, files, contacts, photos etc. to anyone through Gmail.
- In Gmail, you get 15GB of free cloud storage, in which you can store your data online.
Also read;






![How to watch any movie online [FREE में]](https://www.techtrends.blog/wp-content/uploads/2026/01/How-to-watch-any-movie-online-FREE-में-330x220.png)